Thursday, 9 December 2010

HAND AND FEET PRINTS

This is a very fun activity for children, but so messy!!! So you must be prepared to control your stress level! Even with due precautions your floor and clothes will get a bit dirty.

Get your self a big paper roll, the one usually used for display boards at meetings and similar. Roll it out on your hall floor. If you have carpeted floor is best to cover it with naylon. Stick the corners to the floor with sallotape.
Prepare a few large plastic container-lids with hand paint. Also prepare some containers to put some regular paint, get out a brush, sponges of different shapes, stickers and any art and craft materials you come about.

Give your child a nice size apron!!!!

Now let your child explore witht he different types of paint and the different ways he can use them. Encourage him to use his feet and walk all the way to the end of the paper and look at his feet-prints. He can use his hands, paint with a brush, and sponge paint. You may also need to change the paper when he gets too busy.


This can be a nice piece of art to hung on your wall :)

Tuesday, 7 December 2010

WORLD PROJECT

This is a huge project I have in mind. It will take time and effort to make but it will teach M. so many things about the world, its geography, people, cultures, animals and other things.
I got the inspiration from a world puzzle I saw in a Montessori classroom, which brought my memories back of when I used to work on it as a young child.
It is so difficult to find a world puzzle or is so expensive, so I thought I could make one using a very cheap poster of the world.
I bought two posters from the 99p shop.

MATERIALS:

2 world posters
utility knife
a thick card board the same size as the posters
glue


1. Start by laying one of the posters over the card-board
2. Keeping the poster firmly still, cut around the borders of every continent, making sure that the utility knife is also cutting through the card board.
3. you should obtain the cut out continents, their exact shape in card board, a world map without continents and a cardboard with empty continents shapes.
4. glue the cut out continents to their card board shapes, and put aside
5. glue the world poster without continents to the card-board, making sure that they perfectly match
6. glue the second poster to the cardboard so that its continents are visiable through the cardboard cut out continents shapes.
7. colour the back of each continents piece with the Montessori world colours (Africa: green; Europe: red; Asia: yellow; Australia: brown; North America: orange; South America: pink)
8. to make the puzzle last longer you could laminate the continents pieces or use sallotape instead.


Once the child is quite confident in putting together the puzzle and can recognize the continents, you can start witht the second part of the project.

ANIMAL WORLD PROJECT

Get lots of pictures of animals living or originated from differnt continents. Stick them on same size card boards.
Colour the back of the card boards with the right colours of the continent the animal belongs (for example tiger:yellow, zebra:green). Some animals can be found in different continents like the wolf or the owl, these while have more then one colour at the back.
At first show your child all the animals, tell him what they are.
Then place each animal on the right continent.
Eventually your child will be able to place all the animals on their right continent. The colours at the back are a control measure where your child will instantly know if he has placed the right animals on the right continent by turning them around and look at their colours.


Next I am planning to do the same thing with pictures of mothers and babies from differnt cultures, then with food and landmarks.

Saturday, 4 December 2010

CLASSIFICATION CARDS

This is a game that promotes language development and enriches the child's vocabulary.
It take some time to make it at home from scratch, but once is done it will last for ages.
You have to choose five or six different environments in your head and find and cut out photos of objects that belong to that environment from magazines,cheap books, news papers, catalogues (say for example "garden" and "flowers, pots, swing, watering can etc"). You should find between ten and 15 of these objects and also find a picture that identifies the environment you chose or simply draw one.
Cut same size card boards for all your objects and environments.
Glue your pictures on them.
Laminate all your cards.
Find a box where to store them.


Choose objects that your child can say well and other that he doesn't or doesn't have in his vocabulary.
Show each and every picture to the child saying clearly what it is, make him repeat it after you.
Then you can start playing by laying out in a row all the environments; by picking a card from the objects pile, the child has to recognise what it is and where it belongs, then he has to put it down under the card with the right environment on.


SINK AND FLOAT

This is a fun scientific experiment about one of water "magic abilities"!
You will need a sink or large container full of water, a few household objects of different materials and sizes (piece of paper, a key, a small plastic toy, a stick, a nut, a ring etc)
Invite your child to drop in the water one object and observe if it sinks or floats and explain why. Next ask your child to guess if the next object will sink or float, drop it in the water and observe.

Next you can try to make a boat using different materials. First of all paper, then by using a plastic plate as base, a wine bottle lid, a shell etc. Observe some of them sink, and other float.


Here is M. trying sink or float with some rubber toys, a small stone and a boat made with a plastic plate and a sailing.


Saturday, 27 November 2010

Montessori experience

In my quest to find a suitable nursery for M., I have visited a few Montessori nurseries (but only a couple could be called Montessori) and I have learnt and copy a few activities to do at home without the expensive Montessori materials.
It is so frustrating visiting this so called Montessoi nurseries because, really, they are not at all following the Montessori methodology, many do not even have the materials or they keep a few hidden away. It is so bad that any nursery can call itself "Montessori" and knowing nothing about the method! This is because dr. Montessori did not make a trade mark of her name.

Anyway, myself that knows exactly what to look for to distinguish what is real from what is not, observed anything that could be done at home, and here I am telling you, I have also found other activities and inspiration in various books I have read about Montessori activities.

PEGS

Used in a Montessori nursery as "practical life activities": a part from learning to use it as an everyday skill, it also helps develop fine motor skills and a good grip for when the child will learn to hold a pen and write with it.


LOCKER AND KEY

Another "practical life activity": the child learns how to open and close a locker, also good for fine motor skills development.

NUTS AND BOLDS

"practical life activity": the child learns to screw and unscrew: fine motor skills

PUZZLES

Shapes, halves, body parts, world map


WASHING UP


SPOONING AND USING A SPONGE

Very good as every day skills, but also to improve eye-hand coordination, and develop a knowledge about volumes.


COOKING


CLASSIFICATION CARDS

Like flash cards on different environments and animals (I will explain in the next post)


WATER AND FLOATING

Put in a bowl full of water different objects and observe if they float or sink (I will explain better in the next post)

Friday, 26 November 2010

trees and roots

After a long time here we are again. it will be hard to summarize all we have done in these months, but I will try to write at least the most interesting activities.

BOTANICS
Muhajiza showed an interest in trees. I explained to her the parts of the tree and made a model for her to understand the roots and the importance of rain and sun for the tree and its fruit to grow.

First I made her put her hands and wrists on a sheet of paper and draw with a black pen around them to make the trunk and the branches of the trees; then I draw only her hands again on another paper to make roots. In this way she understood that roots are like branches but underground! I cut the around the "roots" and glued them on the wrists of the first paper.


I then I made the leaves and fruits by sticking around the branches pieces of green, pink and purple rolled paper (green for the leaves, pink for the unriped black berries and purple for the riped black berries).


To hide the roots underground, I coloured green a rectangular paper of the same lengh of the paper where the trees are. Then I put it on top of the roots and sticked it with a long piece of tape. In this way the roots are hidden and when the green paper (grass) is lifted you can see the roots.

On the left corner of the poster I cut a rectangular with an utility knife. I prepared a circle and drew on it on each side a sun and a rainy cloud. I then inserted in the rectangular hole.
Each day M. will look at the weather and turn the wheel either to show the sun or the rain, both of which are useful to the tree and the berries.


Monday, 27 September 2010

MONTESSORI EXPERIENCE

I was unable to update the blog 'cause of "techinical problems", but our activities didn't stop!
Since August I am searchind Montessori nusery for M. to stay when the time will come. I went to visit few so called "Montessori" but I was happy with only two of them and I was very impressed by one in particular...I think I now made up my mind. The fact is that Montessori is not a trade mark, so basically anyone can set up a nursery and call it "Montessori" with no knowledge and trained staff in Montessori methodology, and I found out that this is absolutely true.
From the two "good" nursery I observed and then practise at home some good "every-day life exercises", so I got the opportunity to bring some Montessori teaching in our home environment. Moreover I started reading some books about Montessori method and changed the way the furnitures were set around the house to suit M. needs in relation to the Montessori way to teach children independence.
Now M. can easily find any toy she wants and put it back in its place, she can indipendently choose what she wants to play with, without my help in getting toys for her, even pens and paper are readily available at hand whenever she fells like drawing. Only dangerous or very messy things are out of reach because they required my supervision (cutting, painting).
In her room I organized her clothes so that she can easily get a t-shirt or a pair of socks and also sort and tidy up all her cloths once washed, dried and ironed (this is a type of every-day-life exercise).
In the toilet I put a nice mirror at her height so that she can see her self and start brusshing her teeth; I also bought a better step to allow her to reach the sink and the soap dispenser and wash her hand unaided; a higher step is also available for her to reach the "big potty". She is now very confident in going to the toilet completely by her self.
In the kithchen I reserved the lowest drawer for her cups, plates, forks and spoons and also a place mat, so that she is able to set up her place on the table when asked. I have also made available for her a child-size jug to pour her own water. She was already ready to do this without mistakes because of all the exercises she had done putting rice into different size containers and pouring water into different size cups (these are Montessori exercises too in preparation to the child's independence in pouring his own cup of drink).

SPONGE

In the Montessori class-room children are taught how to use a sponge to absorbe water and then how to press it to get the water out onto a container.

WATER POURING

Using different tools the child puts the water into different containers

PEGS

The child learns how to coordinate the movement of two fingers to press the peg to open it

WASHING AND HANGING CLOTHES

BAKING

Sunday, 1 August 2010

EVERY THING BEAUTIFUL

Oh lovely summer is here...we have been on holiday back to our origins. M. learnt so much there about where the fruit and vegetable come from. She became independent on picking strawberries, basil leaves, berries and helped me with other vegetables such as courgettes, aubergines, green beans. We ate so much fresh picked fruit, and M loved it so much. Back in London we kept the good habits and went to the country park to pick some black berries and we also discovered trees of sweet cherries and even peas!
We ate lots of berries and cherries and I also made jam, which she still enjoyes on a melba toast for breakfast.
I have also bought a basil plant and made pesto with the leaves M. picked for me, she also helped me prepare it. It is very good that she understand how fruit and vegetable grow and how we can make delicious things from them in a very simple way.
She is also developing a better understanding of how nature works (the plant needs sun and water and the fruit will ripe with time and with a good deal of sunshine), and grow an emphaty for our world.


We are also enjoying parks very much. Our bourogh is organizing various activities for children around the local parks, and even if there isn't much sunshine, we are having lots of days out, we even watched a puppet show, have face painting and made lots of art and craft, all of this for free!


Oh yes, I forgot! M. became so good with her potty traing that she was keeping herself 90% dry in matter of 2 weeks from the start of the training. After 1 month and half (cause of timeing issues) she got her scooter. She now keeps dry even at night!

Monday, 24 May 2010

Mudchute farm

Summer is her at last!

We made a trip at Mudchute farm where M. can see farm animals, feed them and even touch them and run after them. It is a lovely place where you can really feel like in the country-side.
M. had lots of fun! There were small lambs free on the meadow and she was running after them to stoke them, eventually she cracked the tecnique and managed to successfully touch quite a few of them.
It was a really sunny and hot day. We had a pic-nic with our friends and then a little stroll to make all the little ones sleep.
There is also a small play-ground where they had time to play when they woke up from their nap.


MESSY PLAY

I put some rice on a oven dish and gave M. some containers and spoons to play with it. She put the rice in and out the containers, she tried all the different size spoons and enjoyed this activity for quite a long time.

POTTY TRAINING

M. is now 2 and 3 months, the season is getting warmer and I think she is ready to make the big step from baby to little girl.
I am expecting her to understand exactly where she needs to make a wee and poo and why, and I am also expecting lots of mess and accident for the first week, getting better and better as the days pass.

To make the all process rewarding, and hopefully quicker, I have introduced a reward chart, similar to the ones I made previously. We chose to have Meg and Mog on it, her favourite book characters, and every time she makes wee in the potty she will get a sticker, sometimes even only the effort to sit and try will award her a sticker (at least for the first couple of days).


The first day (friday, 4 days ago)was quite disappointing for me, because M. made a couple of wees on the floor and didn't even care or have any feelings for it, she just moved away from her puddle and kept on being busy with her toys. I didn't expect that she wouldn't even tell me that she has done it!
I felt that I was up to a difficult and long task.

I then introduced to the chart a final prize she would get if she could collect lots of stickers and become really good at using the potty. This prize is something that she wants from long time: a scooter.
I cut a picture of it from the Argos' catalogue and I sticked it to the chart, so every time she goes to put a sticker she is reminded of her prize.
To make her successful efforts even more rewarding troughtout the potty training I told her I will reward her from time to time with a clog-charm for her clogs; since she is into the little mermaid at the moment, I bought from e-bay 4 charms with different characters from the walt-disney animation. Today she got Sebastian because she made a wee on the grass in the park, and when we arrived home I gave her the Ariel one because again she made wee on her own, today she never wet herself.

Now our chart looks like this: stickers that she got for using the potty, on the left the photos of her future scooter and hung on Meg's hat the bag with the clog-charms.


I am really proud of her to have progressed so quickly! Of course I am expecting more mess and accidents, but the important thing is that she is getting in the habit to use the potty.


Wednesday, 19 May 2010

BACK TO WORK

It has been a long time since I last updated the blog. I have been feeling less energetic and recently the weather didn't help. Nonetheless we have done some interesting activities and outings.
M. kept on colouring, drawing and playing with the play-dough and make believe, we went often to the library and to the children's centres. M. is learning to recognise the colours and she learnt to count to 10. In April, during the warm weather we went to the Mudchute farm, the Lady Diana's memorial play-ground and we had a couple of pic-nics in the park. When the weather worsened we went to the Childhood Museum and the London Aquarium.

Today I set few activities for her to do at home.

MAKE-BELIEVE

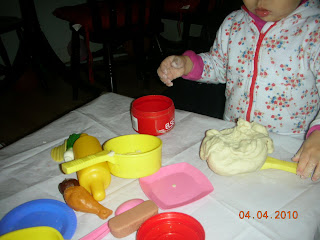
We played with the play-dough and we pretended to make spaghetti, pizza, eggs and cakes.


We pressed the playdough onto the plastic food and felt the different impressions that were coming out.


ANIMALS PROJECT.

M. coloured in a ladybird, a squirell and a bunny.

MESSY PLAY


M. played with water, from the aquarium visit she learnt that fish can't walk and that to survive they need to stay in the water. She often repeats this when she plays with her fish, octopus and wale toys.


ART and CRAFT

M. glued some pasta shapes, rise and lentils to a paper.

Wednesday, 7 April 2010

seems like november again

What a terrible rainy weather.
Back to be forced in doors and getting creative to avoid boredom!

ANIMAL PROJECT

Last week we enjoyed few hours of sunshine. During that time we could go to the park and observe the signs of springs. M. played with freshly cut grass, smelled and touched the flowers on the ground and in the trees, and had some encounters with insects.


I decided to print some insects that M. discovered last week and make her colour them in. Today she coloured in some ants.


ART AND CRAFT

We made some new play dough. This time M. used in her kitchen to make belive cooking lots of different things. She had so much fun.


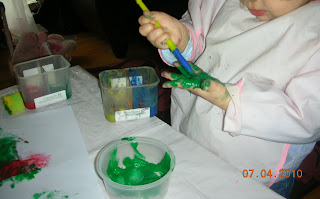
We have also done some sponge painting, but after few minutes it turned into finger painting as it usually does!


Friday, 2 April 2010

dolce salame

This is a recipe from my childhood. I remember it was almost always in the freezer during summer, but there were also good occasions to eat it in winter. It is also linked to my dear grandmother who passed away a year ago, it was her doing it for us, her grandchildren, as a treat.
It is really easy, there is no need of baking and it takes minutes. Older children can managed to do it almost completely by them selves, younger one can have fun helping with some stages.
M. helped mummy breaking the biscuits and cleaning the bowl with her fingers!


INGREDIENTS:

150 gr rich tea biscuits or digestive
70 gr butter
100 gr dark choccolate
50 gr sugar
1 egg

Leave the butter at room temperature for few minutes to become soft. In a large bowl break the buiscuits into small pieces. Melt the choccolate over a bowl of hot water, mix it untill is smooth and then leave it to cool down.
Work the butter with a spoon untill smooth, then add the sugar,the egg and the cool choccolate.
Add the mixture to the broken buiscuits and mix all together.
Put all the mixture onto a sheet of foil big enough to cover it, and with your hand give it the form of a long sausage.
Still in the foil, put your choccolate sausage in the freezer and leave it to rest for at least three hours.
To serve, slice the cake with a knife.

WEATHER PROJECT

It is still very cold, there have been few warm days, but they were quickly forgotten. Last week was a cold one and this week is even worse.
For our project weather we have been looking at the cold weather. I drew a scarf, a hat, a pair of gloves and a coat, M filled them up with a collage of wool strings, pieces of coloured paper and tissue paper.


ART AND CRAFT

We made some cards for family and friends. M. expecially likes putting the glitter on them. I think it is a lovely thing making hand made cards.


REWARD CHART

We accomplished the porpuse of the first reward chart, which was to change the nappy as soon as mummy said that. Now we have a new chart for a baby-habit M. doesn't want to get rid off easily. This one we have done it together: M. chose to have Opsy Daisy on it and then she helped me coloured it in. It works exactly in the same way as the first one, but we have introduced a timer: for every hour she doesn't do the habit, she will receive a sticker, when she gets three stickers I will give her a piece of choccolate. It is working very well and she is so good to control her-self. This exercise is teaching her self-control and patience (cause she needs to wait to obtain the third sticker before getting the choccolate). She is really cooperative and I am very proud of her.

Friday, 19 March 2010

I have not been feeling great this week. Didn't do much. There has been few nice warm days and we went out to the park, and did some wild life observations. M. is really into observing animals, insects and flowers. We looked at snails, ladybirds, warms and daffodils in the local parks

.


GARDENING

Also our hyacits have finally bloomed, after all the care we gave them. The tulips have still a long way to go, but we will wait.


Now I need to develop the photos of all the stages from bulb to flower and display them on a poster so that M. can remember the life cycle of a flower.

5 SENSES

I managed to put together the touch section of the 5 senses laboratory.
For smooth I used a rubber glove; for rough a scrabber sponge; for soft a dust cloth; for the uneven surface a bumpy sponge. I glued each material on a piece of cartoon board.